Do you have an outdoor deck, but not enough knowledge about how to maintain it? Looking for deck maintenance ideas, or tips on how to maintain a wood deck?
Deck Maintenance Ideas and Tips
Here’s everything you need to know about maintaining your deck throughout the year, so you can continue to enjoy a functional, safe and beautiful outdoor living space.
Why Do Decks Need Maintenance?
Any deck, whether made of wood, composites or any material, is bound to start showing some wear and tear over time. Outdoor decks, after all, are exposed day in and day out to the elements: heat, cold, sunshine, rain, sleet, hail and snow. In some climates, decks might have to withstand inches of precipitation and a thirty- or forty-degree temperature shift all within a single day. As building materials expand and contract with temperature changes and absorb or repel moisture while also withstanding the effects of dryness, some damage is bound to occur.
Fortunately, there are several steps any homeowner can take to prolong the life and beauty of their outdoor deck. Some are simpler to do yourself and others may be steps you want to hire a professional like our deck maintenance experts at ABC to tackle for you. Following are some simple deck maintenance tips for every homeowner.
Give Your Deck an Annual Inspection
A formal, professional inspection isn’t needed; all that’s required is a simple, informal once-over using your eyes and your sense of touch to detect any issues. Spring is a good time to do it, preferably after the last freeze or snowfall of the winter season. The easiest way to conduct your inspection? Carefully walk every board in your deck with bare feet, paying special attention to the places where boards are nailed or bolted to support joists. As you go, use both your eyes and your feet to detect any spots that are sagging, broken or uneven, or where nails may have popped up.
Fix Protruding Nails
When nails begin to pop out of the boards of your deck, it’s a hazard not just to bare feet—tripping over a protruding nail can hurt or even cut the bottom of your foot—but to the integrity of the deck itself. Popped nails mean the boards of a deck are less securely attached to the frame. Loose boards let moisture into spaces where it shouldn’t be able to enter, causing mold, warping and other damage over time. Trapped moisture can also make for wobbly, unstable portions of your deck that are prone to splitting.
Be aware that simply hammering a popped nail back in is only a temporary fix. Sooner or later, that same nail will work its way back out again. A more secure and lasting fix is to pull the popped nail from the board using the claw end of a hammer and then replace it with a deck screw that is slightly longer and wider in diameter than the nail was.
Give Your Deck a Deep-Clean
There’s nothing like a good power wash to prolong the life of a deck and restore its beauty. Purchase a special nozzle at your local hardware store to turn your hose into a DIY pressure-washer and give your deck a good spray-down. Just be sure to keep the high-powered stream of water moving in a back-and-forth arc, to avoid creating gouges or otherwise damaging the surface of your deck. Deep-cleaning your deck is also a necessary preliminary step if you plan to re-apply stain or sealant to the boards.
If portions of your deck have become discolored due to moisture from potted plants, you can use a non-chlorine bleaching product or one containing oxalic acid to lighten or even eliminate the stain. (Just don’t use oxygen bleach products on redwood!) These products are also good for treating patches of mold or mildew that may have been caused by puddles of water. Just be aware that the treatment may leave wood with a pale, washed-out appearance, making fresh coats of stain and sealant even more necessary.
Note that it’s also important to clean your deck on a regular basis by sweeping (or shoveling) away puddles, snow, leaves and other debris. Keeping up with this on at least a monthly basis, or better yet a weekly one, and it will prolong the life of your deck and make your annual deep-cleaning job easier.
Repair Any Split Wood
DIY homeowners can replace boards in their deck that have split or splintered due to weathering over time. Here are the steps to follow:
- You can choose either to replace the entire damaged board or, if only a small portion of the board has been damaged, to cut out and replace only that section. If you’re opting to replace only the damaged portion, make marks outside the damaged part, right next to the nearest support joists. Then use a jigsaw to cut along the marks you made and remove the damaged section.
- Use deck screws to attach two-by-four-inch support blocks made of pressure-treated wood to the sides of the exposed joists, flush with the top of the joists.
- Cut the replacement board to size and pre-drill pilot holes for the screws you’ll use to attach it to the support blocks.
- Attach the new board to the support blocks with deck screws.
- At first, new boards will be thicker and wider than older, more weathered boards. If your replacement board doesn’t shrink enough over the course of a month or two, screw down the deck screws enough to make them well recessed into the wood, and then use a belt sander to smooth the wood down to the same level as the rest of the deck.
Re-apply Deck Stain and Sealant
This is a big job, one that many homeowners opt to hire out to the professionals rather than tackling it themselves. However you choose to do it, it’s worth the time, cost and effort.
The best time to stain and seal a deck is either before or after the rainy season, to make sure the wood has plenty of time to dry between coats during this multi-day process. After removing all potted plants, deck furniture and other furnishings and then deep-cleaning your deck, allow the deck to dry for a day or two. Then use a pole sander with 80-grit sandpaper to smooth the surface of the entire deck. Once the deck’s surface is smooth and swept free of sawdust, it’s time to apply your stain or sealant products of choice.
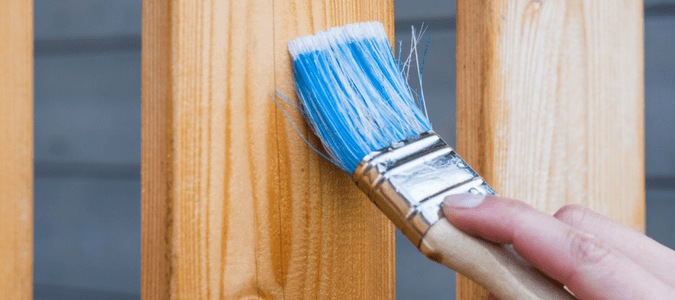
Want to add color before you seal your deck? Apply a semi-transparent exterior stain with a brush or a paint roller. Let the first coat sit for twenty minutes or so and then go back over it with a brush to eliminate stain puddles and create a smoother finish. Then apply a second coat and you’re finished! Once you’ve let the stain dry for at least 48 hours, you can apply a sealant.
Note that while some sealants already contain stain, the color may go on unevenly and may also fade unevenly over time due to normal wear and tear. For greater control over the final effect, it may be best to use separate products for stain and sealant.
As far as long-term protection against weathering, oil-based sealants are superior to water-based ones, but they can be trickier to use. Good sealants also come with UV protection to help protect the wood from the damaging effects of the sun. Depending on the weather conditions of your region, you may also want to look for a product that contains mildewcide to help prevent mildew and mold due to precipitation.
You can apply sealant to your deck using a brush, a paint roller or even a mop. Using a brush allows for the most control, but it’s also the most painstaking and time-consuming way to do it. Whichever tool you choose, apply a single, even coat over the entire deck, using a small paintbrush to treat corners and other hard-to-reach areas. Once the first coat dries, you may want to apply a second coat for added protection.
Be sure to allow the deck to dry completely before walking on the new finish or returning plants and furniture to their places.
Let ABC Be Your Handyman
Having the time, tools and expertise to take care of a deck can be a challenge. Let ABC repair any problem areas, reseal your deck, power wash it or perform other tasks around the house that have been on your to do list forever. Leave the hard work to us, so you can spend more time enjoying your outdoor (and indoor) spaces.