You do what you can to keep your pool clean and well-maintained. You skim for leaves, bugs and other debris. You sweep. Even when you are not sure you need to, you vacuum.
Compared to some of your neighbors, you feel like a responsible pool owner.
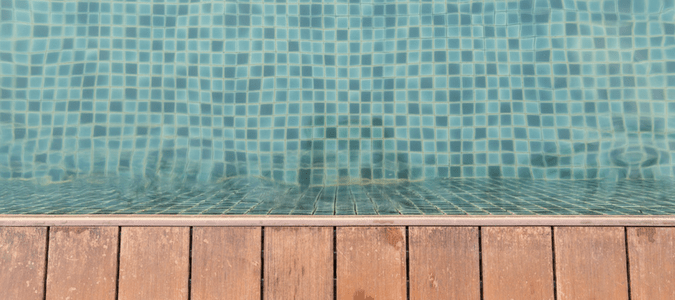
One day, you notice that the plaster seems to be discolored right around the water line. What’s going on?
If this has happened to you, you are absolutely not alone. This is one of the more common questions pool owners have, along with another frequent query: Why is my pool green? Most likely, if you notice stains along your waterline, you’re dealing with a calcium deposit. Unfortunately, it tends to be very difficult to clean calcium deposits.
You’re likely wondering how to remove calcium deposits – but, what exactly are they?
What You’ll Learn:
- Understanding Why And How To Remove Calcium Deposits
- Why You Need To Remove Calcium From Pool Tile
- How To Clean Pool Tile With Vinegar
- How To Clean Pool Tile With Muriatic Acid
- How To Clean Pool Tile With Pressure Washer
Understanding Why And How To Remove Calcium Deposits
How–and why–does a pool develop calcium deposits?
There are a few reasons you may start to notice these stains around your waterline.
The first is hard water, which can leave behind a calcium residue over time. If you live in a part of the country with hard water, you’ve probably already noticed this buildup on your faucets, sinks and maybe even tubs.
The second culprit is heat, which the southern half of the U.S. has in abundance. Not only do high summer temperatures cause pool water to evaporate more, but also they raise the temperature of the water itself.
When combined with the third culprit—the chemical makeup of your pool—these conditions can lead to calcium deposits. Specifically, if your pool has high pH, high alkalinity and warmer water, calcium scale will begin to form.
The reason this situation so often happens at the water line is because of evaporation.
These crystals of calcium may appear as nodules that dot metal and plaster, or they might become crusty deposits that live in the corners of your pool.
Technically, these are two distinct things. Calcium carbonate, which tends to manifest as a flaky substance on the surface of the pool, and calcium silicate, which is grayish white and harder.
Either way, they’re not exactly aesthetically pleasing.
But that’s not the worst part. To protect your pool, you need to remove calcium buildup altogether.
Why You Need To Remove Calcium From Pool Tile
Sure, no one wants to swim in a crusty-looking pool. It just feels gross and icky. If that was the end of the problems that calcium deposits caused, it wouldn’t be such a big deal. You could probably suffer through the summer, for example, and then have them cleaned off when you’re not going to use the pool quite so much.
Unfortunately, that isn’t wise.
Why?
Because calcium scale also does damage to your pool and pool equipment. That damage will only get worse until you have it removed.
Without pool tile cleaning, what can calcium deposits do to your pool?
Clogged Filters
Pool filters are meant to deal with water or other kinds of typical pool debris—bugs, leaves and so on. What are they not meant to do? That’s right: clean calcium deposits. So as more and more calcium buildup runs through the filter, the system will slow down and not work as well as it essentially gets clogged up.
Plaster Damage
Without any effort to remove calcium from pool tile, calcium deposits will continue to grow and spread to other areas of the pool—even, potentially, on the bottom. This can result in pits being created in the plaster that you’ll have to pay to have refinished or resurfaced.
Eye And Skin Irritation
If people do continue to swim in a pool with the excess calcium that is causing the deposits, there is a strong chance that it will cause irritation to their skin and eyes.
The long and short of it is that calcium deposits and scaling look unappealing, make pools uncomfortable to swim in and can cause serious and expensive damage long term.
Knowing all that, why wouldn’t you try to remove calcium buildup as quickly as possible?
Now, let’s consider how to remove calcium from pool tile. Some materials and tactics which have proven to be effective include:
- Baking soda
- Borax
- Dish soap
- Muriatic acid
- Toothpaste
- Vinegar
- Power washing
Let’s focus on one of the most popular – how to clean pool tile with vinegar – as well as a few other options, depending on how much calcium buildup there is to remove.
How To Clean Pool Tile With Vinegar
Baking soda, borax, dish soap, toothpaste and vinegar can all be used in pretty much the same way to clean calcium deposits, so you can use most of the information here related to vinegar and apply it to those cleaning agents as well.
What do you need to start cleaning?
- a cleaning brush (an old toothbrush can work well for this)
- a spray bottle (optional, but recommended)
- vinegar (a 5% solution should be fine)
Once you have these items, you can start cleaning.
There are no special tricks. You either put the vinegar in the bottle and spray the solution onto the calcium deposits or simply pour it on from its own bottle, then use the brush to scrub the scale away. That’s it.
These types of cleaners tend to work quite well if you catch and deal with the problem early on and employ them fairly regularly to prevent build-up.
What if the deposits don’t go away with a little scrubbing? It’s time for a different plan.
How To Clean Pool Tile With Muriatic Acid
When we say muriatic acid is a “more serious” pool cleaning method, we mean it. The word “acid” indicates that this is more powerful than other types of solutions. You can find this chemical at a home improvement or pool supply store.
With vinegar and the other mild cleaners we’ve already mentioned, you can get into the pool while you’re cleaning. With muriatic acid, however, this is absolutely not something to try.
Here’s what you need to get started:
- container of muriatic acid
- goggles
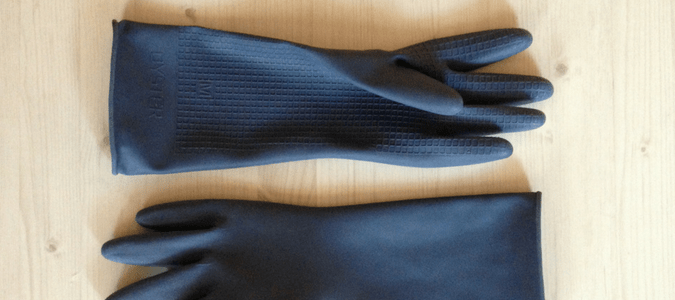
- rubber gloves
- respirator
- plastic bucket
- plastic measuring cup
- plastic spoon
- plastic spray bottle
- marker
- nonabrasive scouring pad
This list of materials is enough to make you realize that this goes way beyond pool maintenance for beginners.
Gathering your materials is really just the beginning. Below we’ll detail the steps. Before going forward, we just want to remind you that that muriatic acid is dangerous. You may decide to have a pool cleaning company handle your problem rather than risking possible injury.
Yes, it’s that serious.
If you’ve decided you would like to try this yourself, let’s (pun intended) dive into the step-by-step instructions.
Gather Your Materials
Put on goggles, gloves and a respirator. Then head outside with all your ingredients to start mixing. Absolutely do not try to perform the following steps in an enclosed area.
Prepare Your Cleaning Solution
Fill your bucket with a gallon of water. Pour 8 ounces of muriatic acid into your measuring cup, then slowly pour that acid into the water. Always pour acid into water instead of the other way around, because acid is more likely to splash out the other way. Another thing to keep in mind is that you want to pour slowly, because mixing the two together can produce heat, causing the mixture to boil.
Combine Ingredients
Take your plastic spoon and mix the water and acid. Again, do so slowly, because you don’t want it to boil.
Transfer The Mixture
Carefully fill the plastic spray bottle with the water/acid mixture.
Label Spray Bottle
Use the marker to label the measuring cup, spoon and spray bottle with “Muriatic Acid.” Do not attempt to use the chemical for anything else. If you’re worried this could happen, set aside the bottle for proper disposal.
Scrub Pool Tiles
While remaining outside the pool, use the spray bottle to spray the pool tiles. Then, scrub them with your nonabrasive scouring pad.
Safely Dispose Of Unused Acid
Contact your local pool supply business or municipality to learn how to dispose of any unused muriatic acid. Do not simply throw it away or pour it down a drain.
Because muriatic acid is so much stronger than vinegar or the other cleaning agents mentioned above, it can remove calcium deposits that are much more advanced. That being said, with deposits that have been growing and hardening for a long time, sometimes not even muriatic acid is enough.
If that’s your situation, you have two remaining options: a pumice stone and a lot of elbow grease, or pressure washing.
Since we already spent time on the intense nature of cleaning with muriatic acid, we will skip the pumice stone method to give you a break and talk about pressure—or bead—washing.
How To Clean Pool Tile With Pressure Washer
When people talk about using pressure washers to clean calcium from pool tiles, they don’t usually mean real pressure washers. In fact, if you try to use a regular pressure washer, there’s a good chance it won’t work the way you have intended.
Instead, what people are usually referring to is something that professional pool cleaners use called bead blasting. This process uses compressors to “blast” beads, sand and other materials (depending on the specific tool used) at your tile at a high speed to basically blow or scrape the calcium deposits away.
It works amazingly well, and it’s fast. Best of all, you aren’t doing the labor!
Unfortunately, it can also be pricey—especially if you plan to do it without the help of a pool cleaning service.
Prevent Pool Staining With ABC’s Help
As most pool and homeowners will readily admit, maintenance is always smarter than having to deal with more costly interventions if you haven’t been safeguarding your investment. Remember, calcium deposits occur when there’s hard water, heat and high amounts of certain kinds of pool chemicals. When regular maintenance and cleaning are just not something you can handle on your own, enlist the experts at ABC Home & Commercial Services. Our trained and experienced technicians can ensure that your chemicals always remain balanced, and you never suffer any buildup. Leave the hard work to us, so that you can spend more time enjoying your pool.